I used to live in a very humid, hot area. My loft apartment at the time had a laundry room, and when the washer and dryer ran, the room got extremely humid. So I would have to open the window. The second issue was that I had an AC unit with a remote. When I left home, I constantly forgot to turn it off, which would require me to come back, take off my shoes, find the remote, and then leave again. So I had an idea that would kill two birds with one stone. Automation!
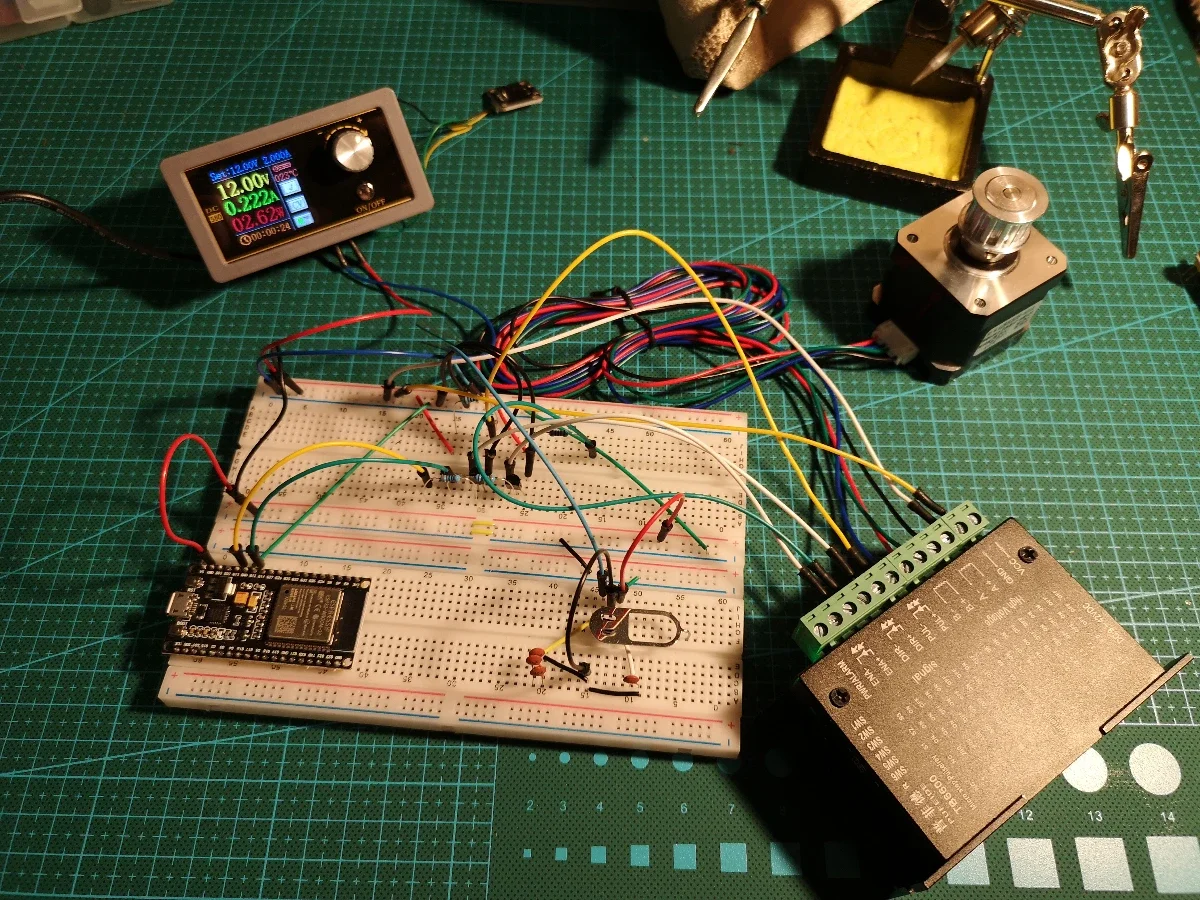
I had never really soldered before this, or remembered anything about circuits from school, so I had to do a lot of learning. I found some chips called the ESP32. It's a small microcontroller that has Bluetooth and WiFi functionality. This gave me a great idea. Give it access to the internet!
This is a picture of me experimenting with the chip, trying to make it control a stepper motor.
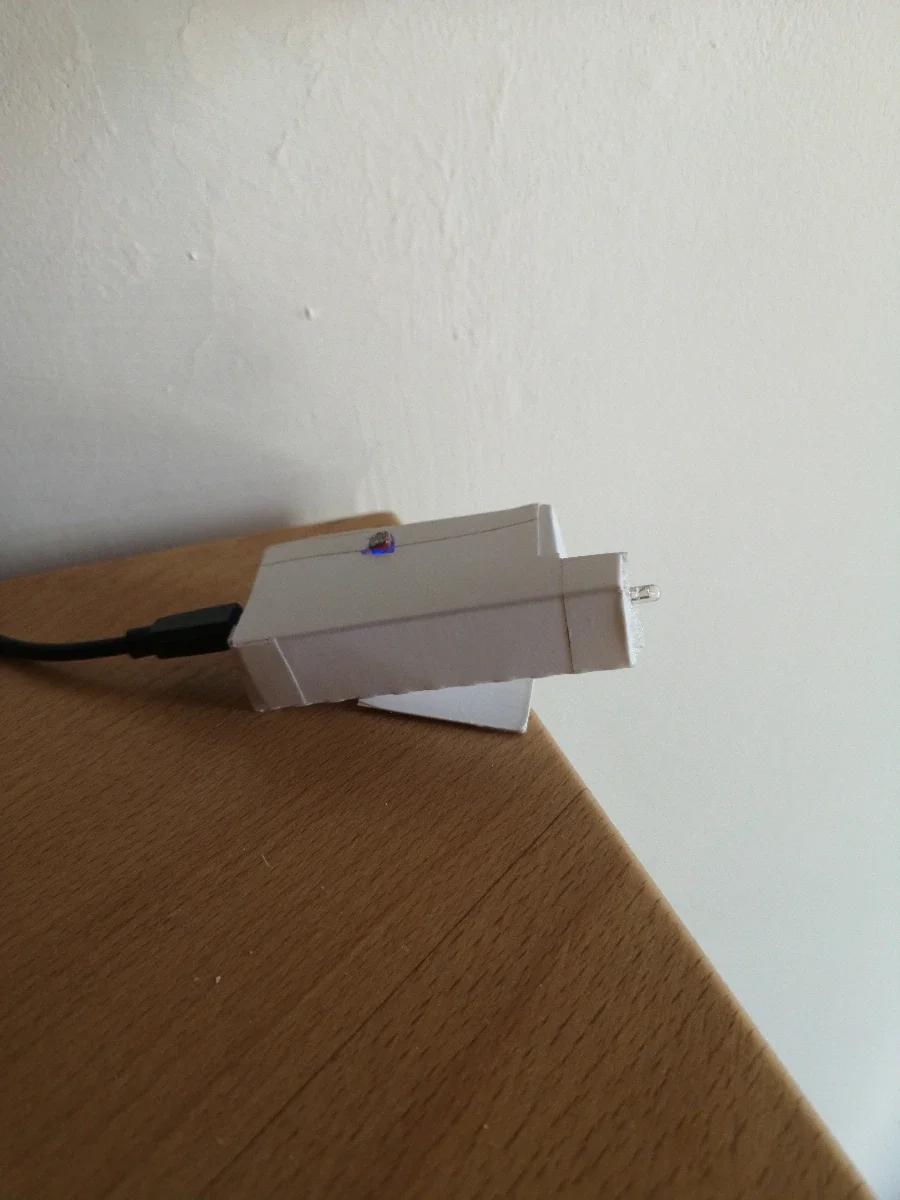
The AC remote was fairly simple. There are great IR remote libraries out there that have the exact configuration I needed. So I soldered together the ESP32 and an IR LED, and put it into a little box. This would sit pointed at the AC, and when a command is received, it sends the exact signal a remote sends, and turns my AC on, off, higher, lower, swing, etc.
I decided to forgo a battery, as even a big battery would last about a week or so before needing a recharge. For something I want to set and forget about, a simple phone charger was the best choice.
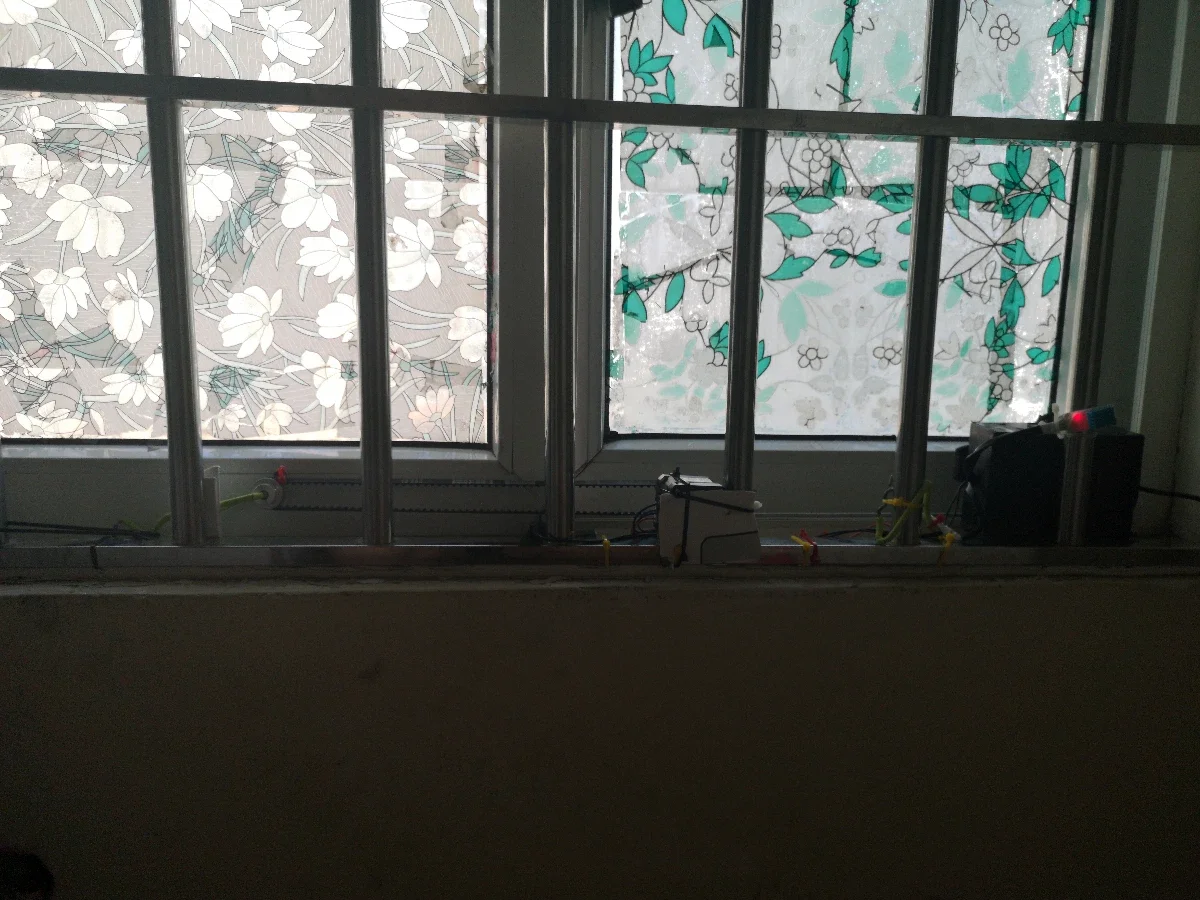
For the window, the issue was that this was a rental, and I was not allowed to drill into the walls or make any permanent changes. (The bars are there because this is a fairly tall apartment, and all windows low to the ground need bars, for pets and children.) So the approach I went with was a belt and zip ties. This made it fully removable and flexible. (Which came in handy in the future when I moved.) The ESP board would receive a command, and would turn the belt, pulling the window open or closed. There were two magnet sensors, one on each side of the window, to tell if it's open or closed.
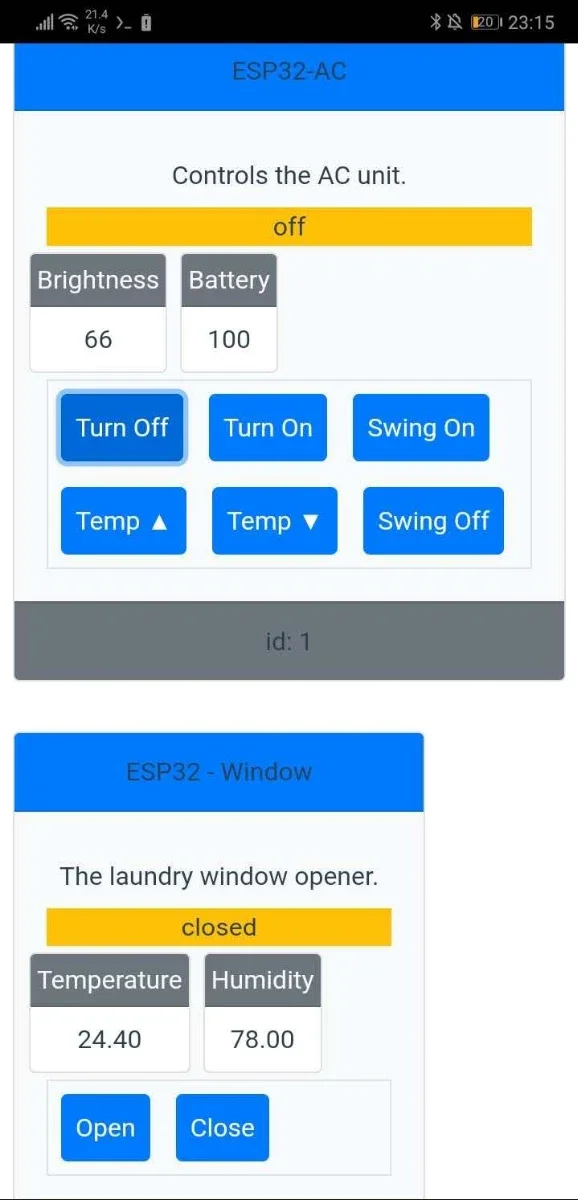
For the actual control, I created a small Python script that used asyncio to run a small web server. If an authenticated request was received, the web server would send a command to the ESP32s, which were connected on the same network at various addresses. The server would regularly scan the 192.168.1.x IP range for any device that answers a specific request. Then it would save those addresses and keep them in memory.
For the frontend I decided to learn Vue.js. I already had experience with Angular, so I decided to try something new. When you log in and authenticate with the server, the server sends you back all the devices it has, along with the 'valid' commands (a list stored in the device itself). It's all very flexible, and allowed me to add any kind of device in the future without ever needing to change the backend code.
This was the first proof of concept page. No styling, just quick rough components to make it work. And it does!
Update 1
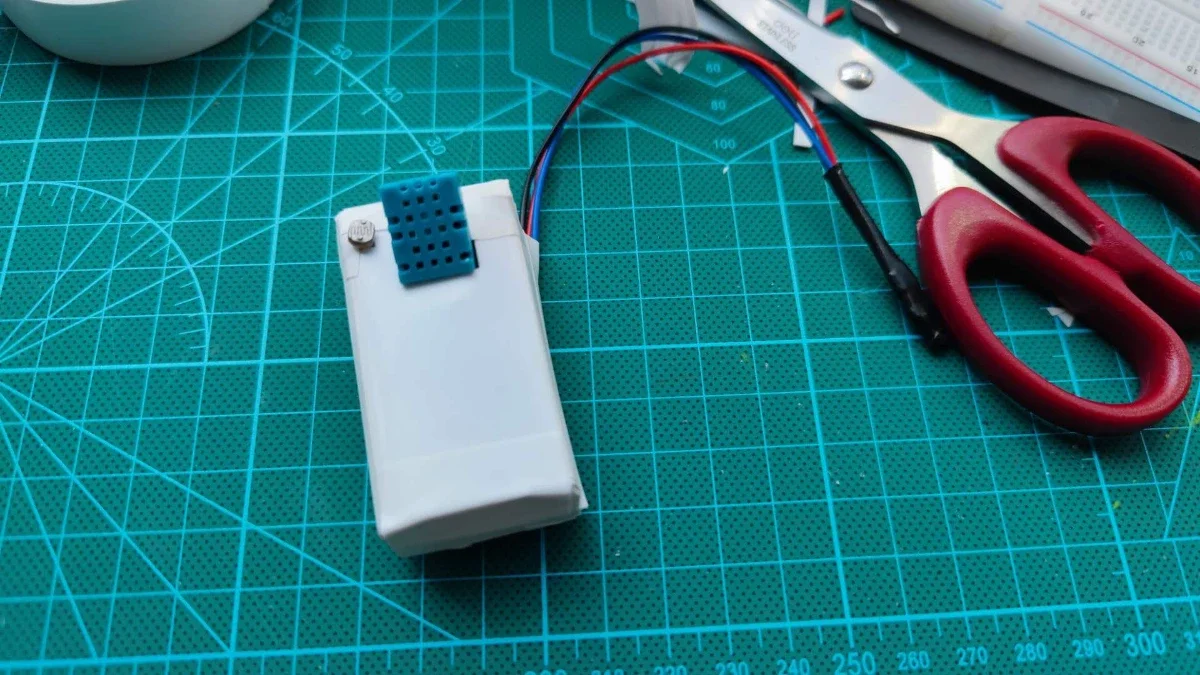
Next I wanted to add some more devices. One idea I had was a temperature/humidity/brightness sensor with a magnet sensor attached, so I could add it to my main living room window. When I open the window, it turns off my AC if it was on. This window was really big and heavy, so attaching a motor wasn't feasible, but a sensor was good enough for what I wanted.
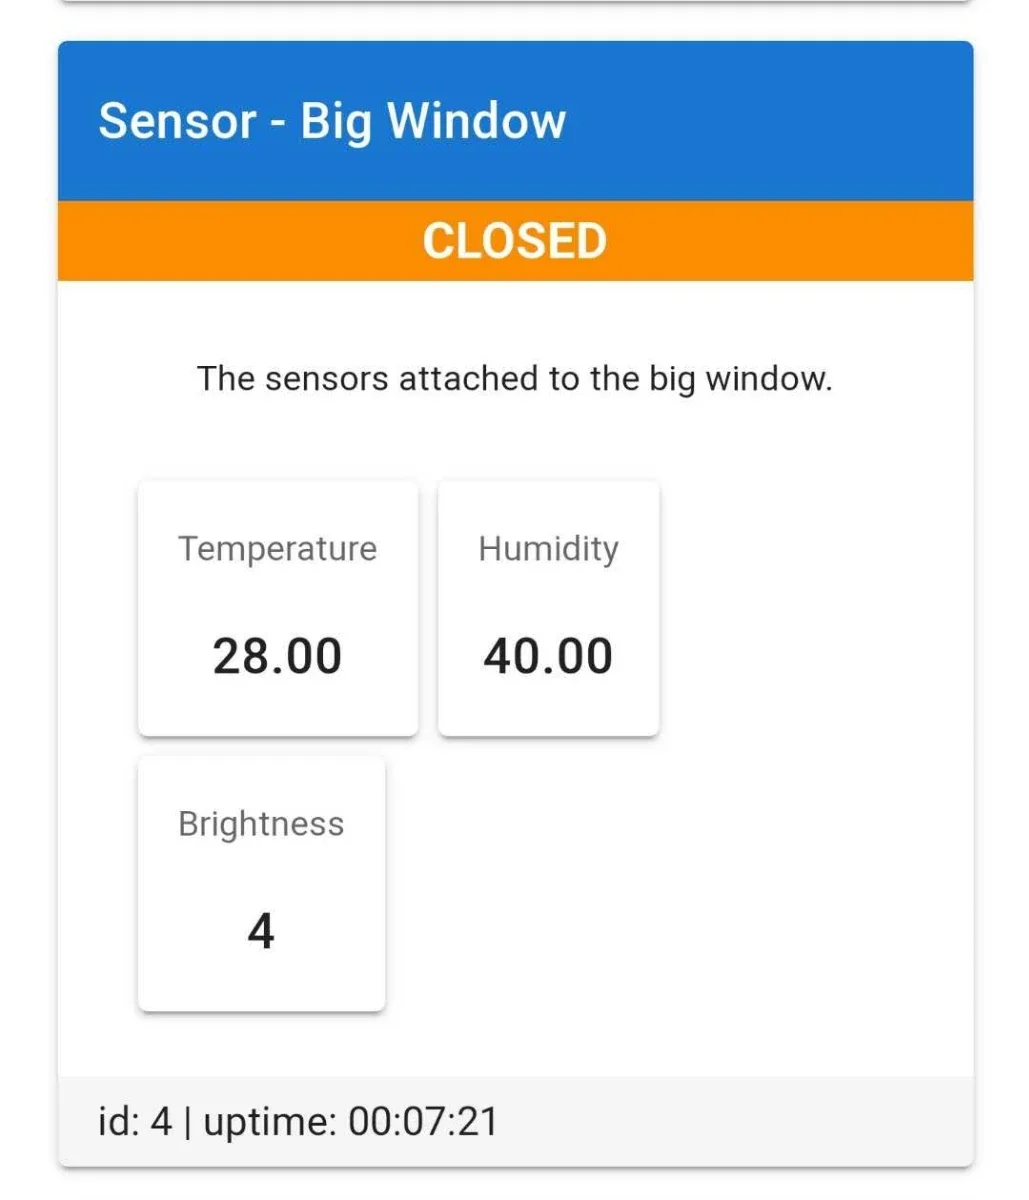
A newer and nicer design for the devices.
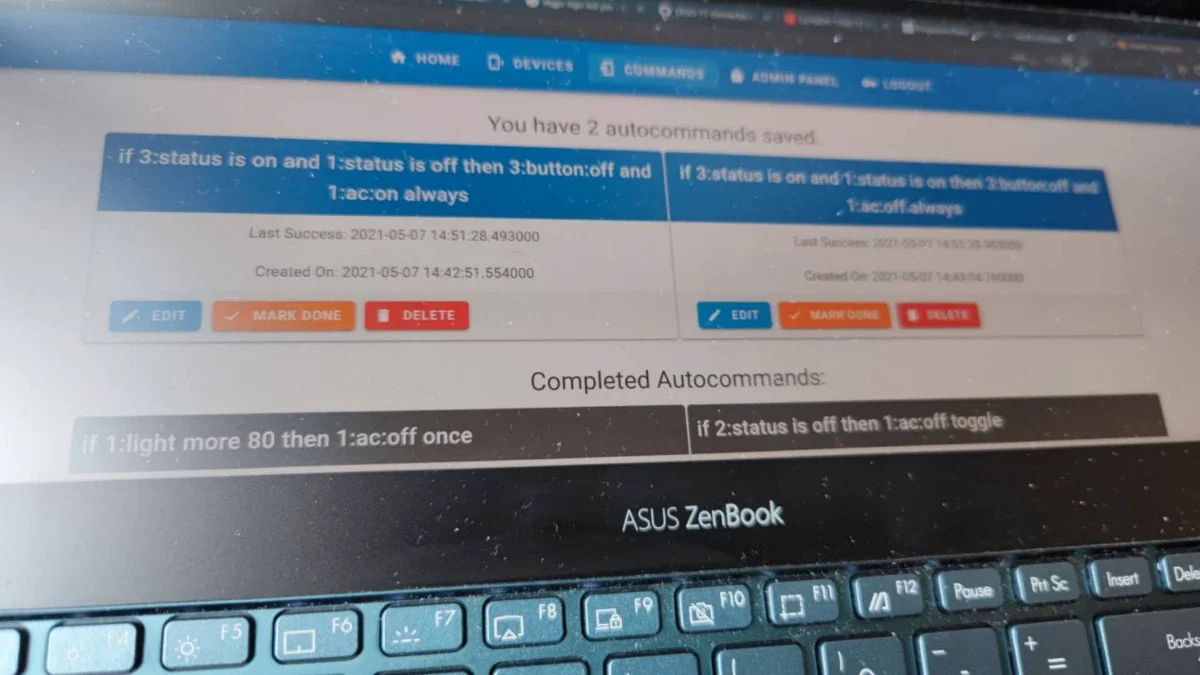
Next I added what I call Autocommands. Essentially I made a small language parser. The way I made it is very flexible and very powerful. It parses device data, and values given to it. If you say if 1:status is on then 2:ac:off, it will check when the status of device ID #1 is on, then send the command ac:off to device ID #2. You can combine expressions and use brackets, so things like "if it's past 7pm and it's not a Sunday and neither of the two windows are open then turn on the AC to 23c" are entirely possible.
Update 2
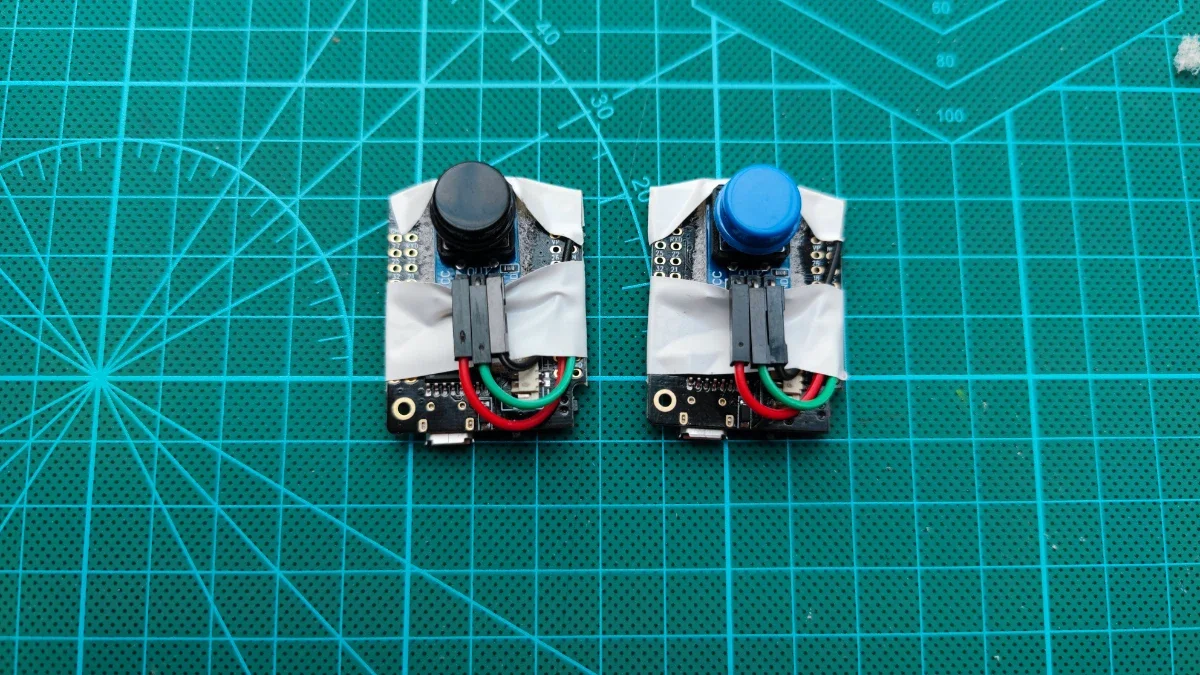
Next I built 2 little buttons. That's all they are. They can be on or off, and you can toggle them with a push. By themselves they aren't useful, but combined with my Autocommands from earlier, they let me create large macro commands with a simple push.
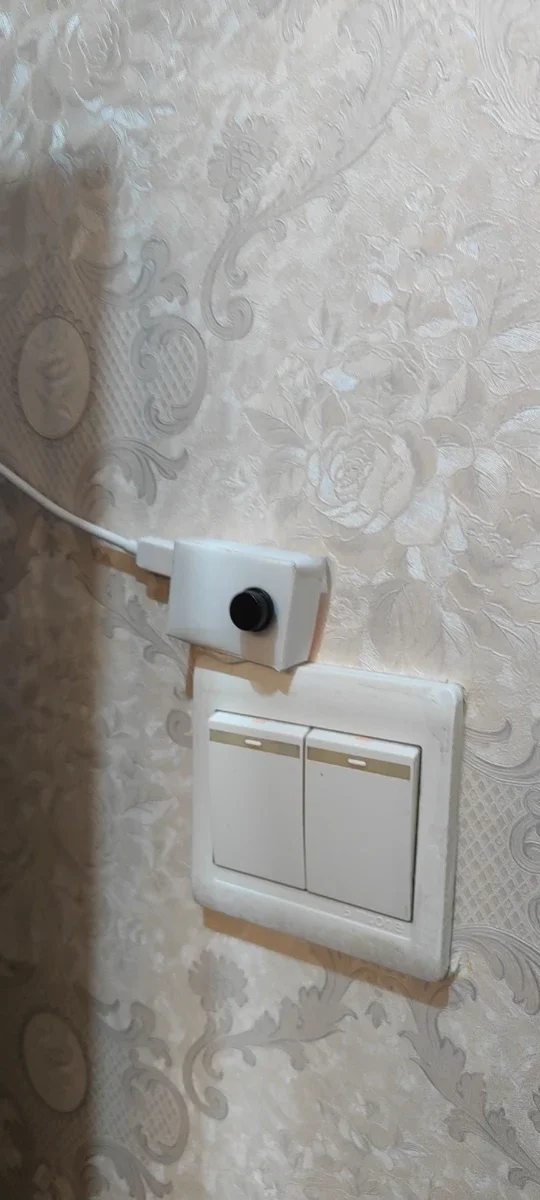
Adding a button to the light switch at my front door? Now I can turn off my lights and AC, and close my window, with just one gesture.
Update 3
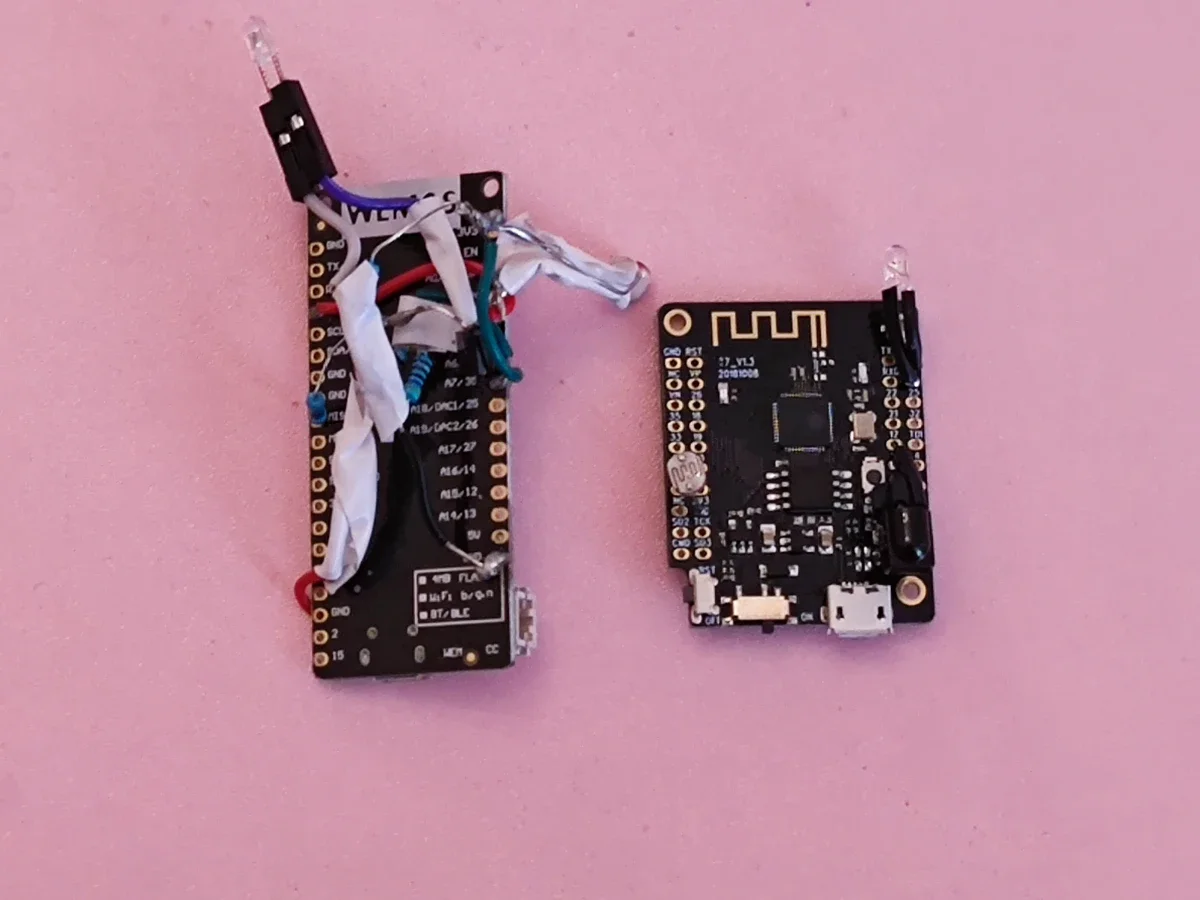
I moved into a new apartment, which had two AC units. I decided to make a new device. Can you guess which of the two was my first attempt at electronics 1 year ago, and which one is the new one?
I essentially scrapped the old design and made a much simpler version. The new device also includes an IR sensor, which lets it receive commands from a remote. One issue I was having was that when you turn off the AC with the remote like usual, the server doesn't know this, and treats other Autocommands as if the AC was still on. Now if you use a remote, the device updates the status accordingly.
This also allowed me to record and replay remote commands, because the new AC unit I had was not included in the IR library.
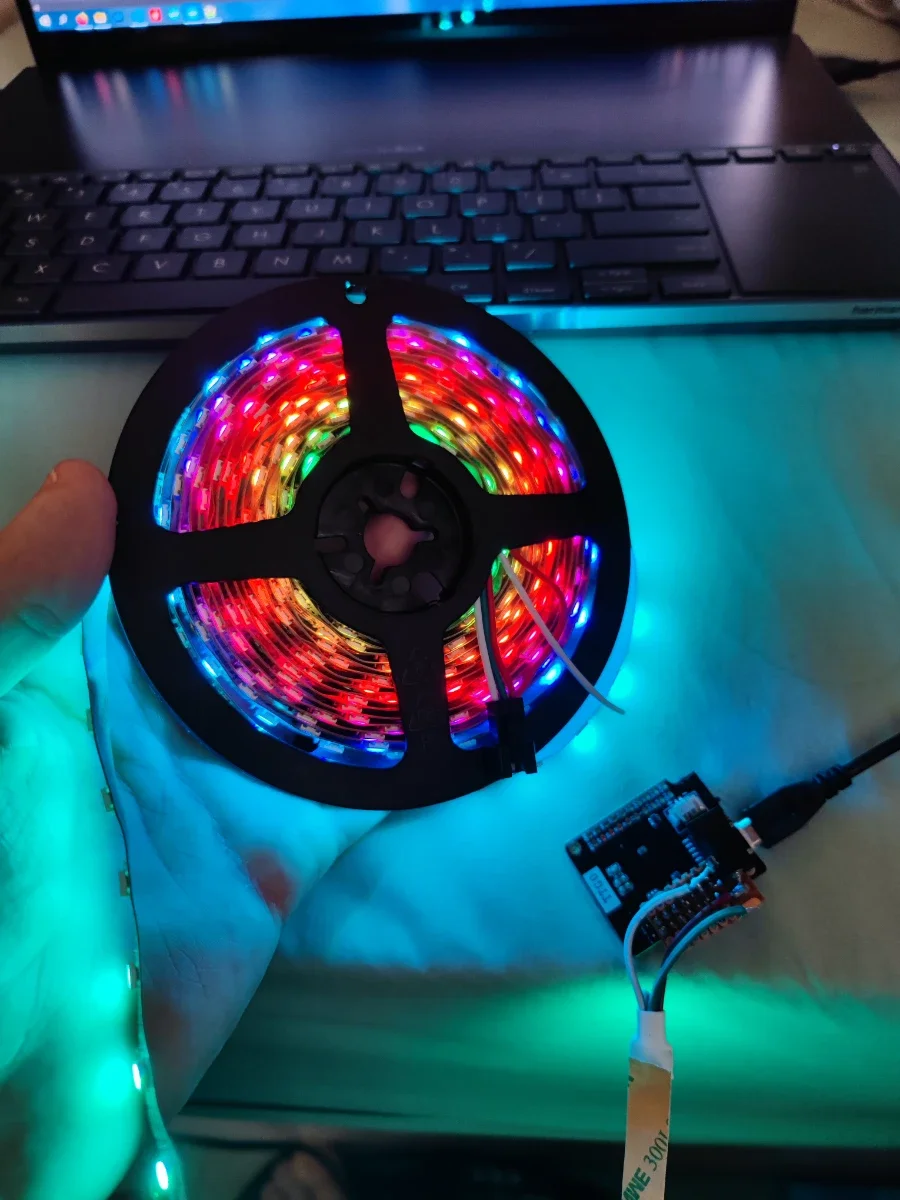
Next I bought some lights. They were very cheap, as they're just a series of LEDs. The controller is an ESP32.
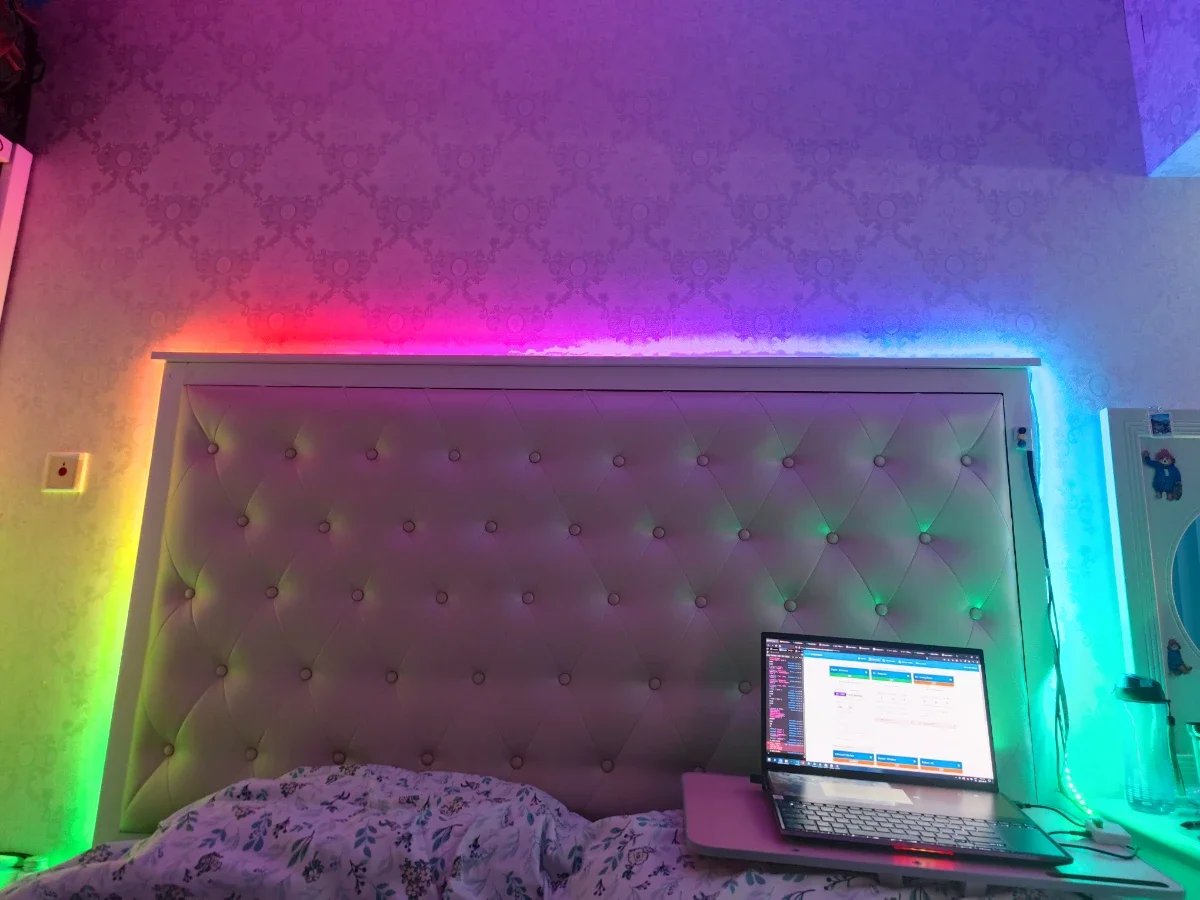
This lets me have any colour of light in the bedroom, and it also means that I don't even have to turn on the main light at night. The light switch is annoyingly far from the bed, and it is very frustrating to have to stand up to turn off the lights. I can turn off the lights with my app, or with some buttons that I added to the ESP32.
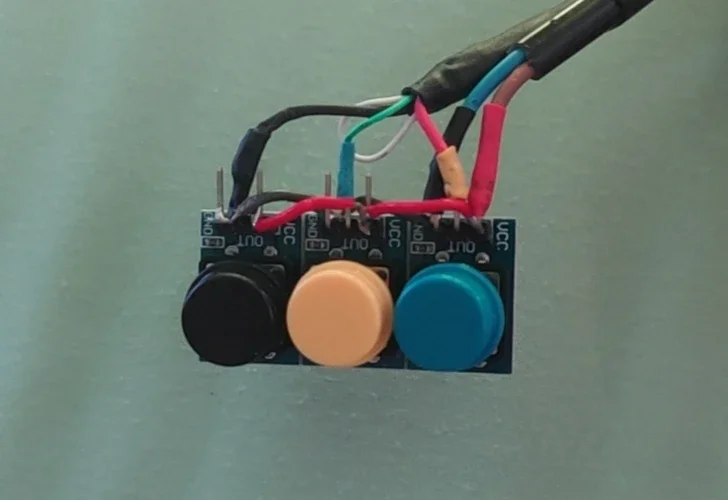
The blue button switches back to the previously used colour, the white button switches to a very bright white light, and black turns it off. It's also added to the Autocommands, so I can turn off the lights automatically at 9:30 on weekdays.
Update 4
RGB is a little over-hyped. Most colours just cause headaches, or are uncomfortable to use, which is why I never fully understood the appeal of those Philips Hue light bulbs. You're only going to use the basic white, maybe yellow. But you know what's cool about having 100 RGB LEDs? The animations! I also made a few others: an aquarium with ocean colours, a Christmas one to have on during Christmas time for fun, and my favourite, a fireplace animation. It really does feel like you're sitting near a fire, and it's the perfect lighting when you go to bed. No blue lights, just calm warm lighting. This pattern turns on automatically, and can be turned off with the button on the side, the app, or the button near my front door. Very handy.
Update 5
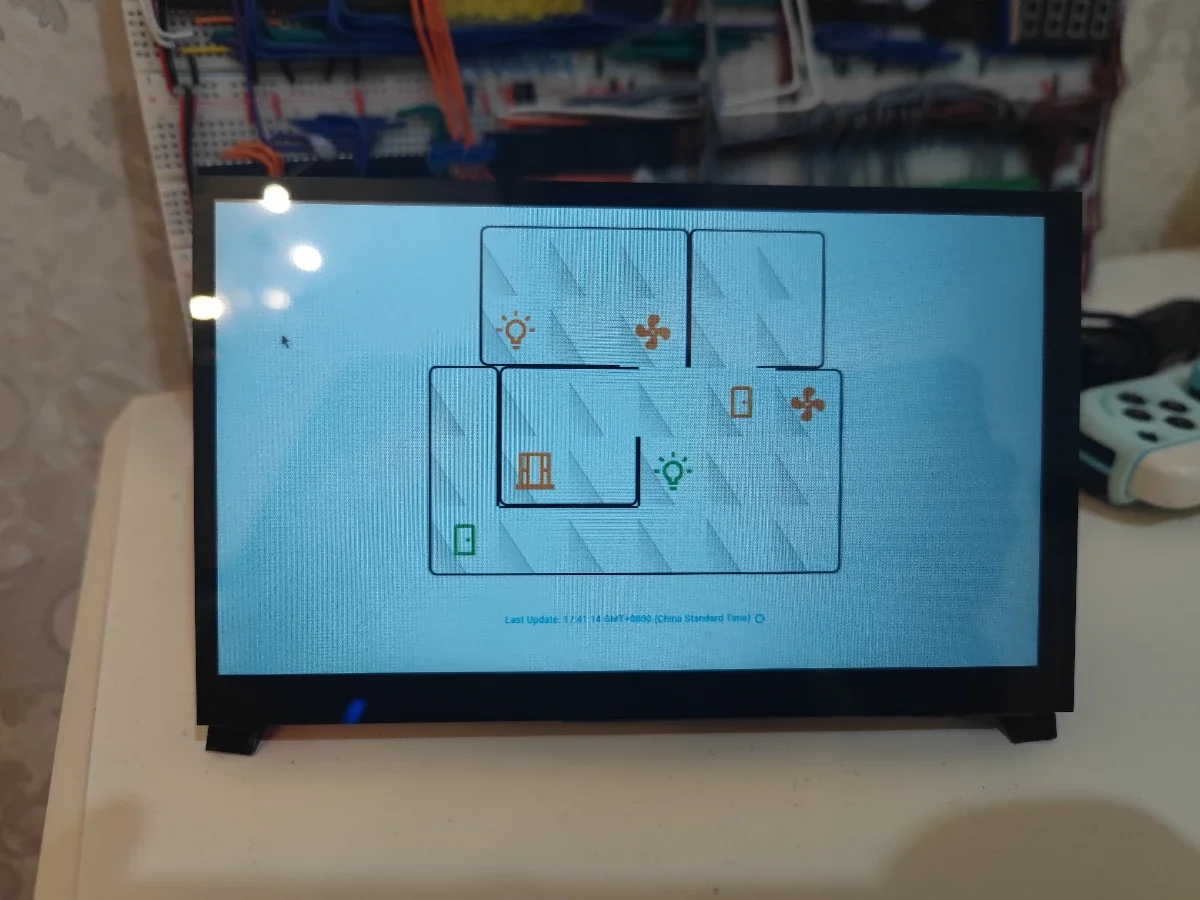
Time to put it all together. I created an editable map, which let me map out the apartment and add all the connected devices. You can see my two small AC units, the bedroom lights, living room lights, and 2 balcony doors.
The server now runs on a Raspberry Pi, connected to a small 8 inch touchscreen. This way I have access to any device at a glance.
I also created an admin panel, which lets me create a temporary guest user that gets deleted after a set number of minutes.
Update 6
Now with AI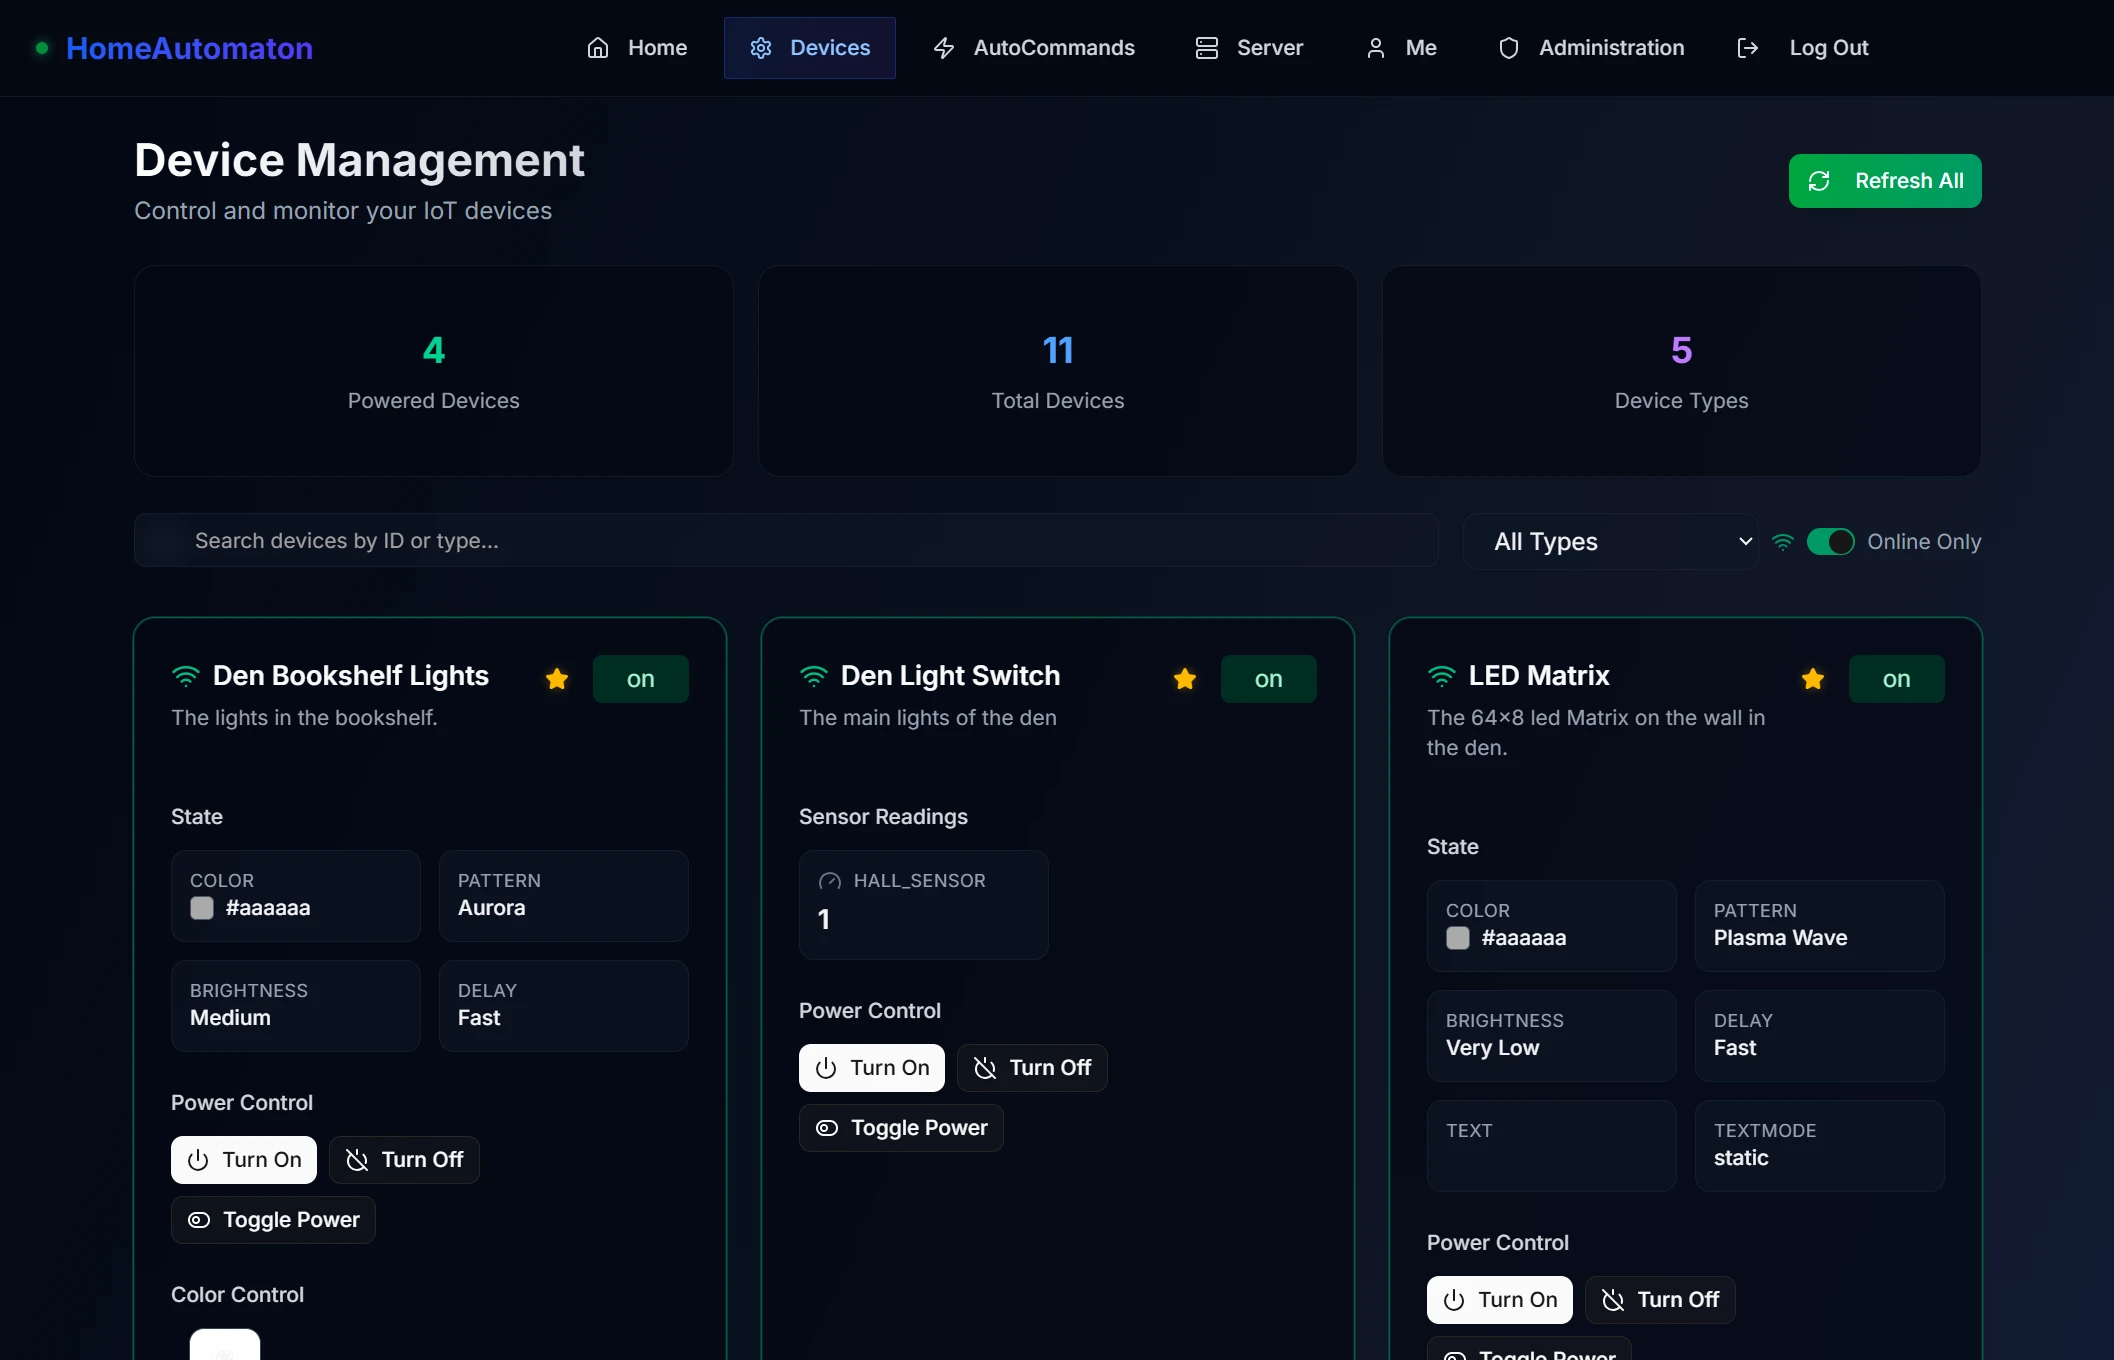
The system is still running, and it has grown up. This is the control panel today: 11 devices across 5 types.
It now runs on my Kubernetes cluster, next to everything else in the apartment. All of its logs go to my Grafana Loki stack. And it is now exposed as an MCP server, so an AI assistant can control the same devices the buttons do.